In this post we'll look at how to develop in Python using Visual Studio Code. I'll also show you a few extensions that can make your life much easier while working with Python!
Initial setup
When you install Python (which I recommend you do via the official installer), remember in which folder you installed it. And on Windows, make sure to tick the "Add Python to PATH" in the first screen of the official installer.
Download Visual Studio Code and install it like you would any other application.
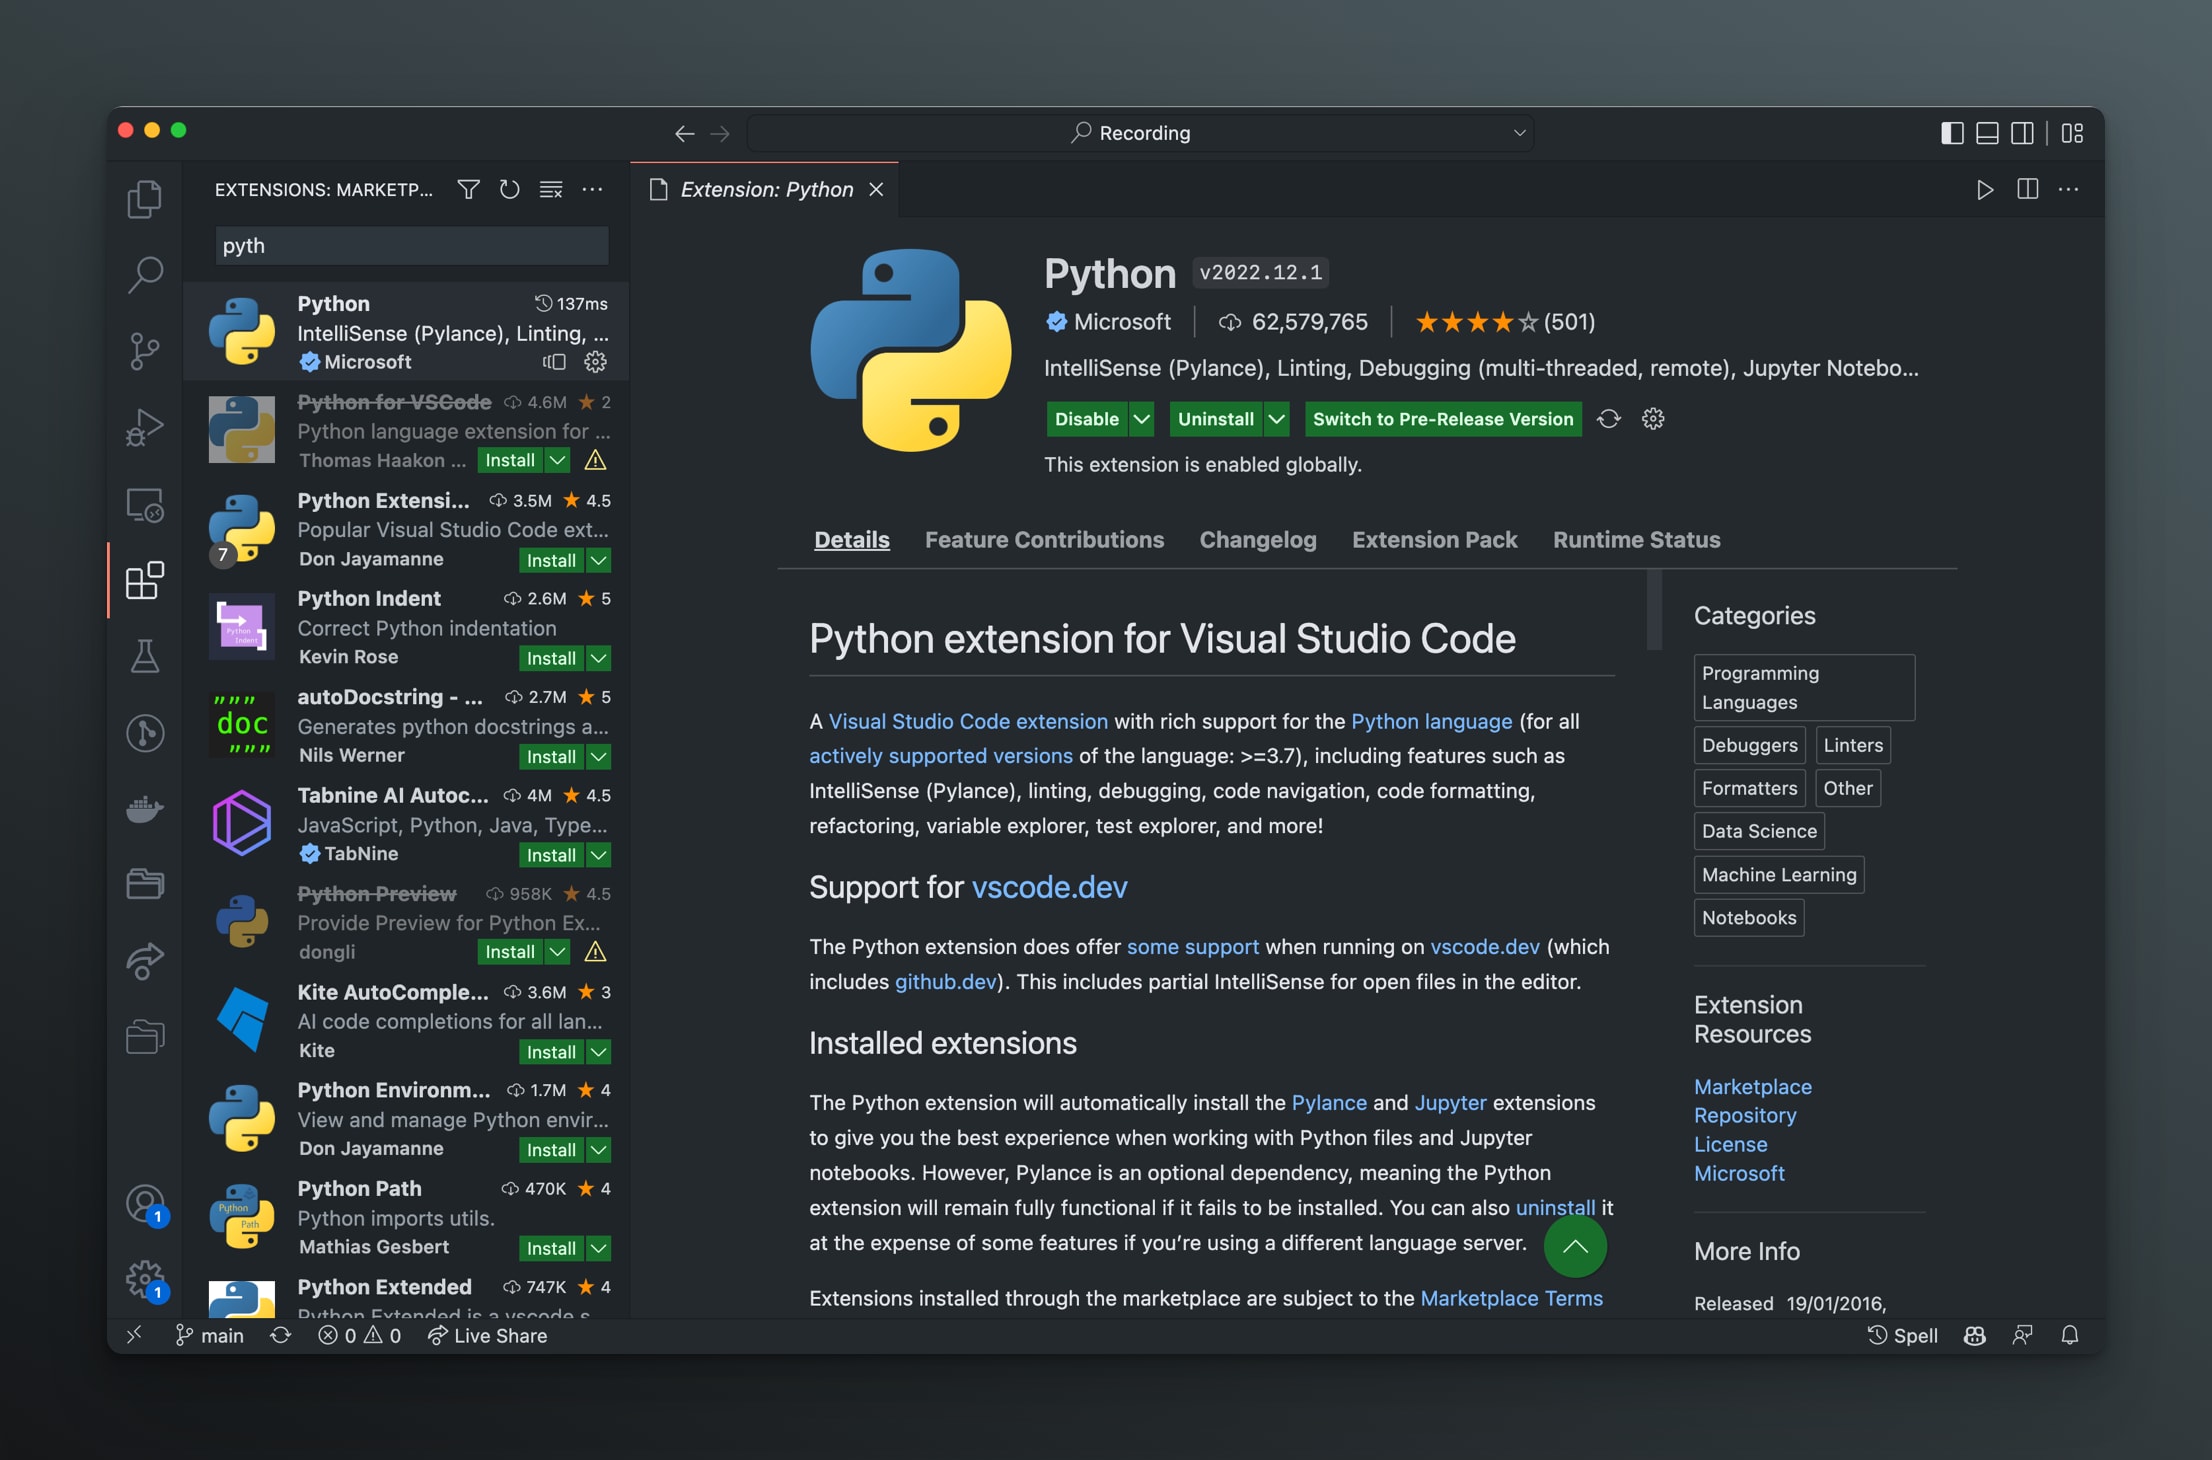
Open Visual Studio Code and navigate to the Extensions panel on the left hand side. There, look for the Python extension and install it:

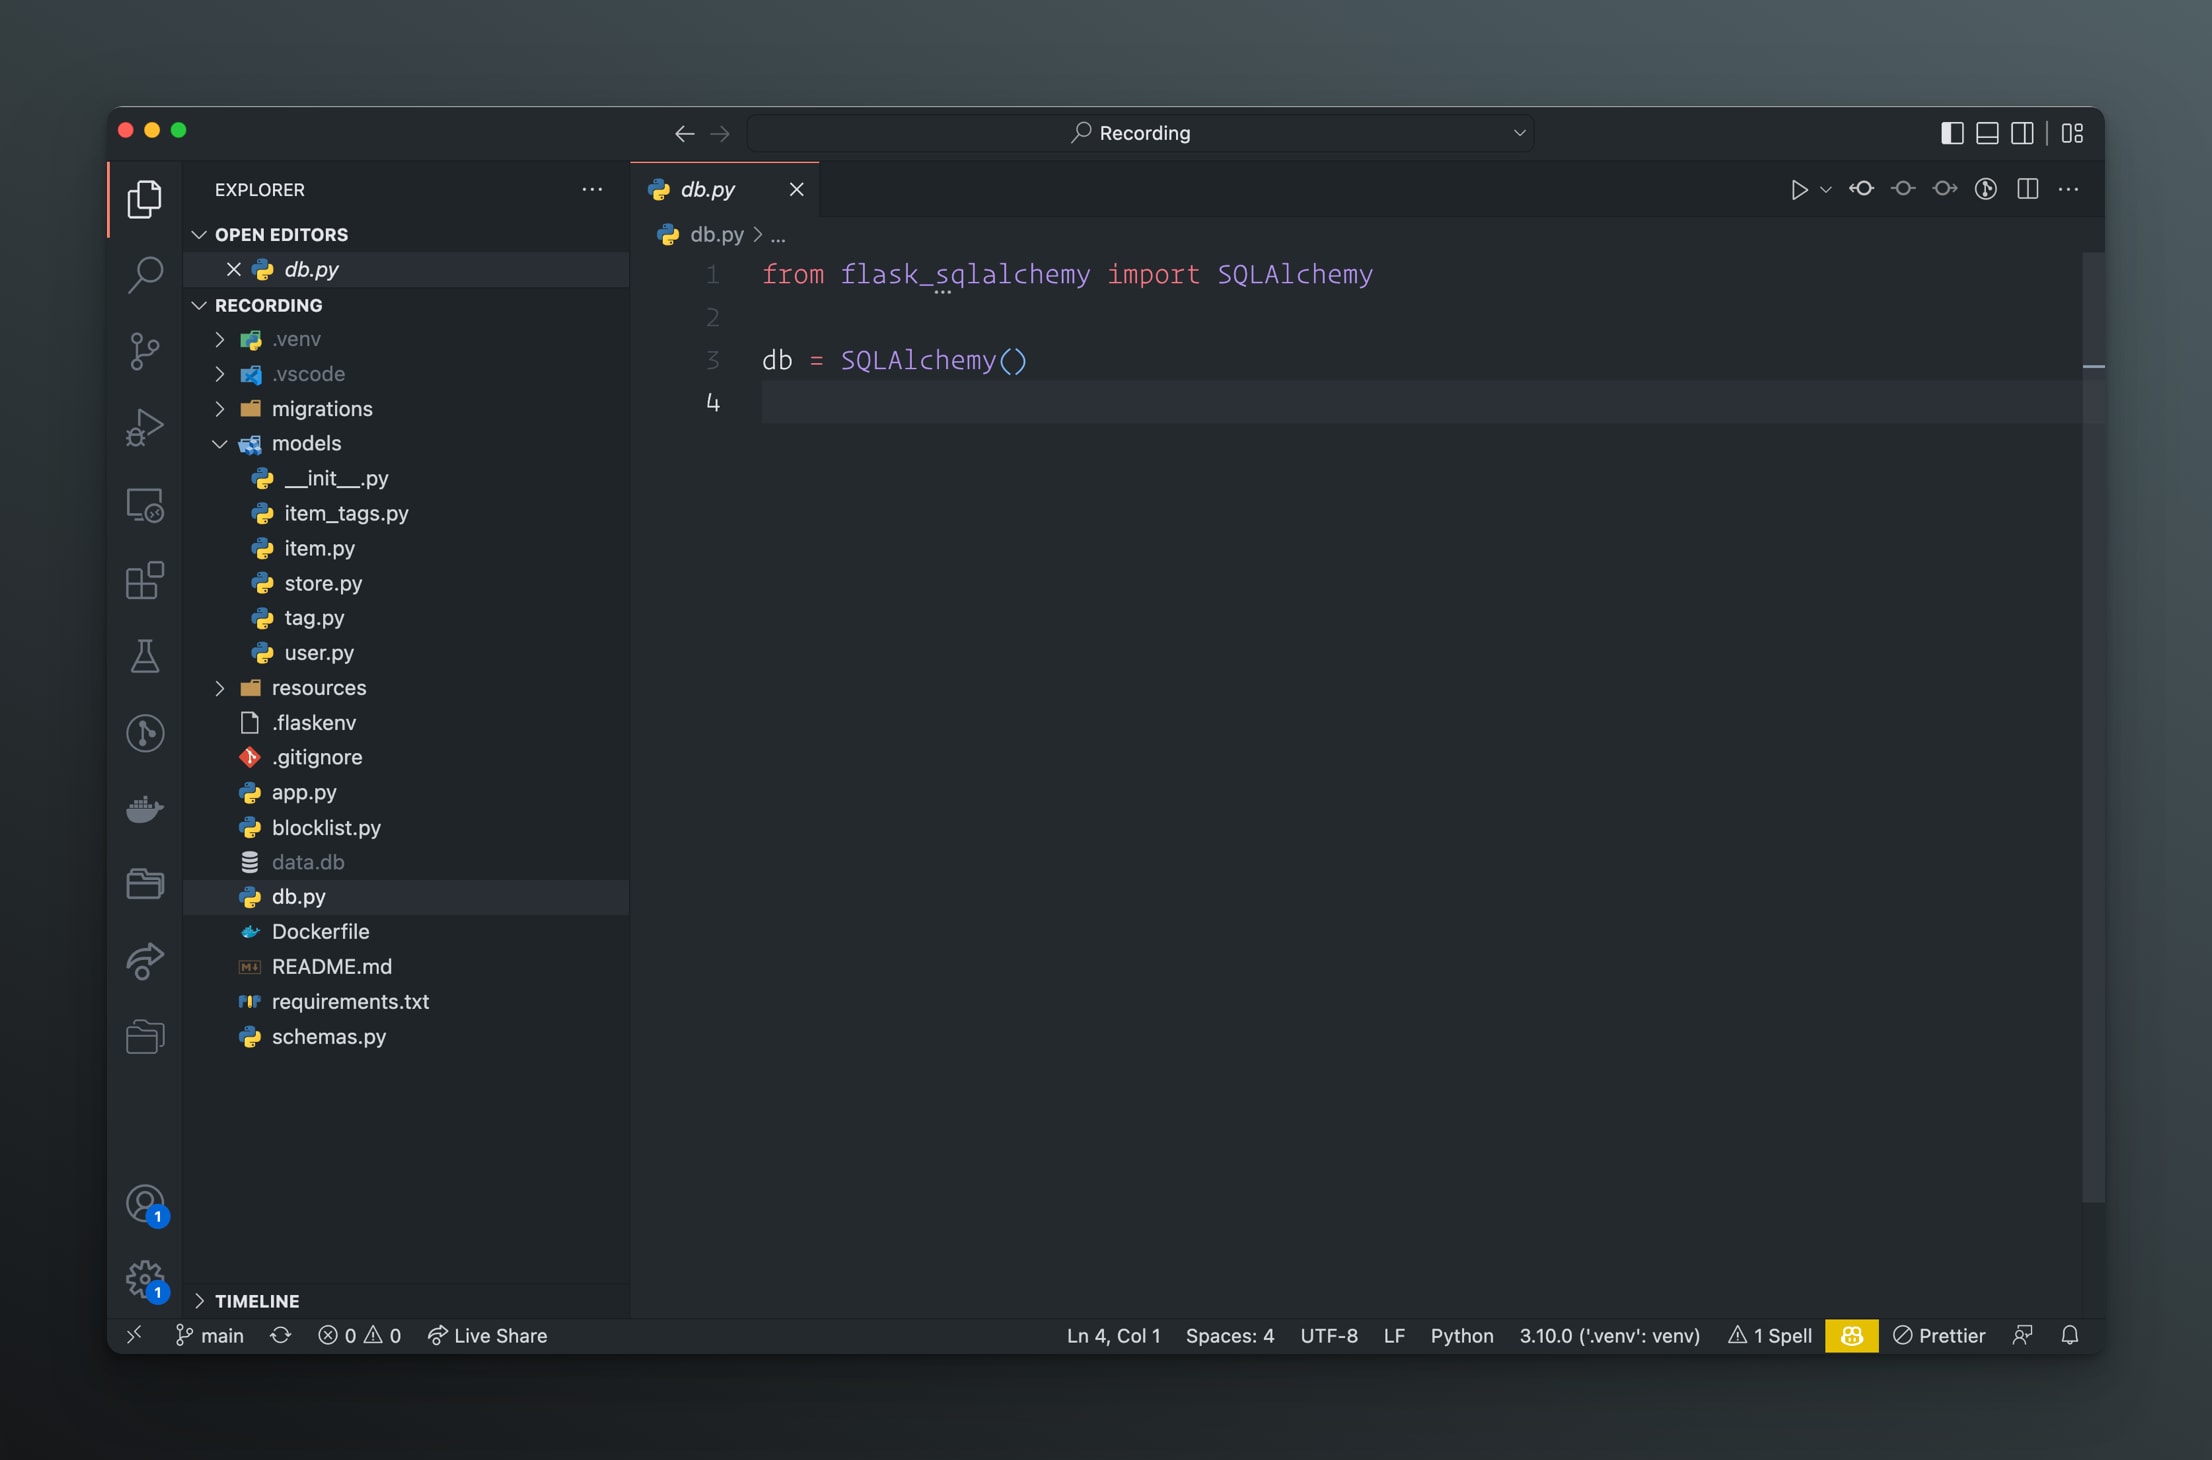
Once that's installed, you can open any folder using Visual Studio Code and create a file that ends in .py. The Python extension gives you syntax highlighting and also helps you code by offering suggestions and hints.

You can change which version of Python the extension uses by clicking on the bottom right, where in the screenshot it says "Python 3.10.0".
After you create a virtual environment, which you should always do for each Python project you work on, you can choose it as the Python interpreter by clicking on the "Python 3.10.0" button.
Our article, "Working with virtual environments: the complete guide", will help you learn how to use virtual environments if you aren't familiar with them yet.
Here's a link to the Python extension: https://marketplace.visualstudio.com/items?itemName=ms-python.python.
Linting, formatting, and sorting imports with VSCode
Changes since last update
Previously we recommended using Ruff for linting, Black for formatting, and isort for sorting imports. Now, Ruff can do all three so we only recommend using that.
Linting with Ruff in Visual Studio Code
A linter is a tool that checks your code for common issues, and warns you if it finds any. There are many linters in the Python ecosystem, but lately I've been favouring Ruff. It's fast and extensible.
The easiest way to get it to work in Visual Studio Code is to install the Ruff extension. Here's a link to the ruff repository and the extension repository in case you want to read up on it further.
Formatting with Ruff in Visual Studio Code
The Ruff formatter has sane defaults, which means you don't have to configure it at all. Just install it, tell VSCode to run it, and you're good to go.
Ruff is compatible with Black, so if you are using that formatter, you can just switch over to Ruff for some speed gains at no cost!
To use Ruff for formatting, just use it as the default formatter. You can do this in settings.json by adding the following key:
"editor.defaultFormatter": "charliermarsh.ruff"
Or in the visual settings editor by finding "Editor > Default Formatter" and selecting Ruff from the dropdown.
Import sorting with Ruff in Visual Studio Code
Sorting your imports may sound like a completely useless thing to do, but we do it for consistency. It's especially useful if you are working on a codebase with other people.
Sorting the imports means that when you import a built-in library (e.g. os), that goes at the top. Then, go third-party libraries, like flask. Finally go imports from your own codebase. Within each of these three segments, it sorts imports alphabetically.
This makes it a bit easier to find the import you're looking for, if you have many of them.
Ruff can sort your imports for you, in a format that is almost the same as isort. If you were using isort, you can switch over to Ruff for massive speed gains at almost no cost. There are some minor whitespace differences between the two.
Sorting imports and formatting on save with VSCode
To enable formatting and import-sorting on save, open your VSCode settings, and then open them in JSON format using this button:

In there, make sure these settings are there (careful to not have duplicate settings, though):
{
    "[python]": {
        "editor.codeActionsOnSave": {
            "source.organizeImports": "explicit",
            "source.fixAll": "explicit"
        }
    },
    "editor.formatOnSave": true,
    "editor.defaultFormatter": "charliermarsh.ruff"
}
Here's what each of the keys mean:
[python]: the following settings only apply to the Python language.editor.codeActionsOnSave: the following settings define actions that the editor will run when a file is saved.source.organizeImports: tell the editor to sort imports on save.source.fixAll: tell the editor to use the linter to fix all issues it can (those it can't fix are just left as warnings).editor.formatOnSave: format the code when we save the file.editor.defaultFormatter: which formatter to use by default, using Ruff here.
Now whenever you save a file, Ruff will sort your imports, will try to fix what it can (and warn you about what it can't fix), and format the code.
The indent-rainbow extension
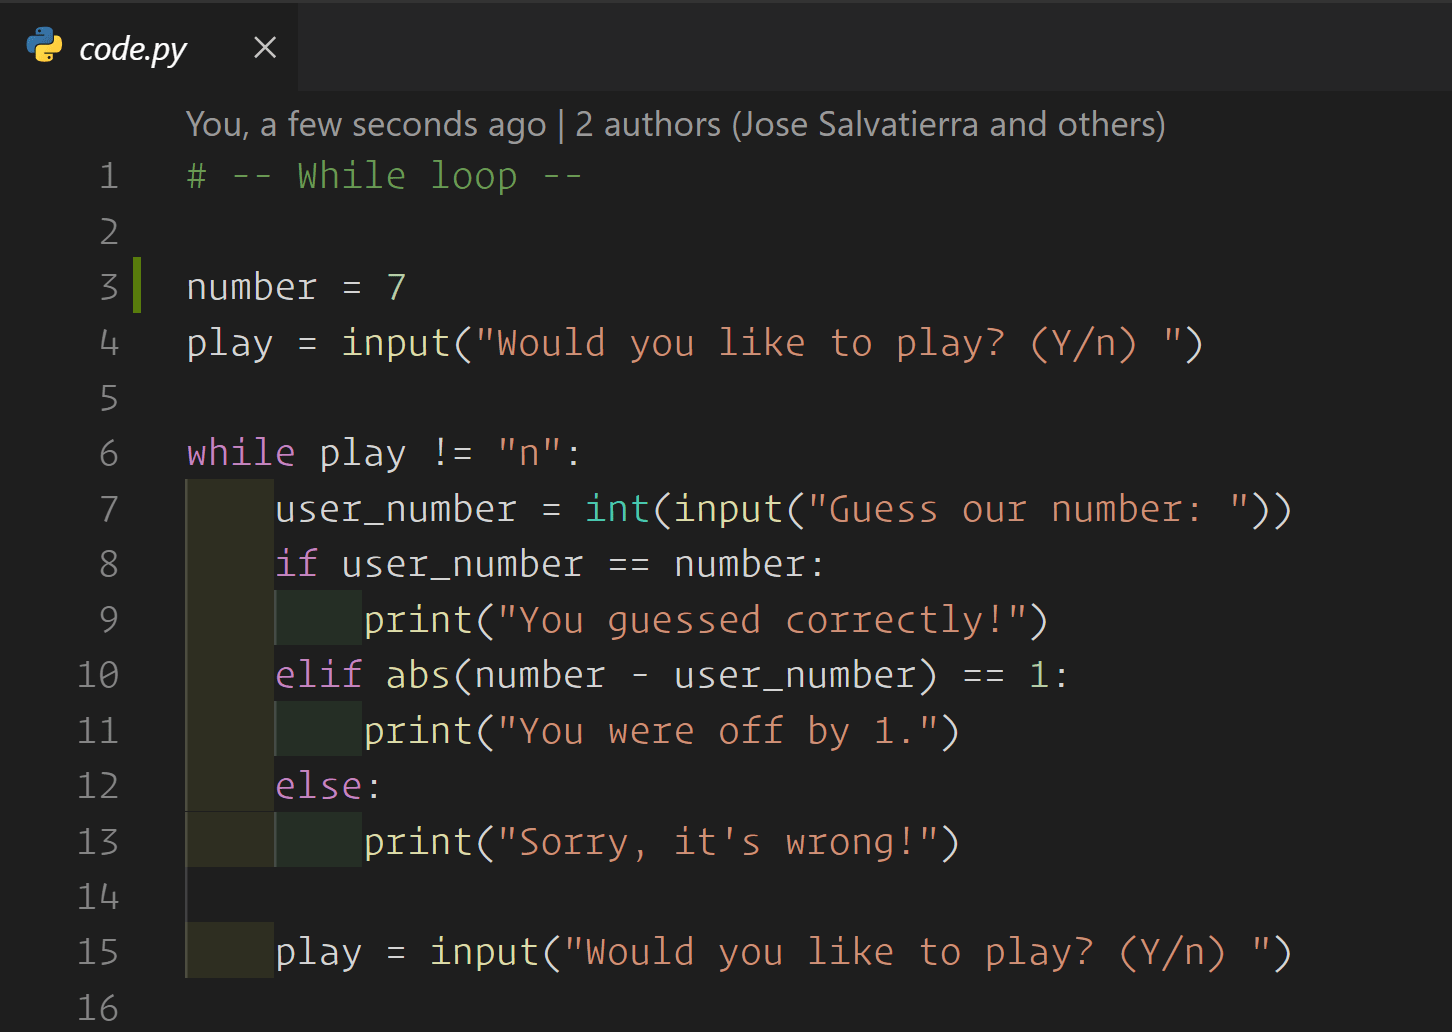
An extension called "indent-rainbow" will color every indentation level in Python in a slightly different color, so you can easily tell which parts of your code are at which indentation level.
This is what the extension will do:

Link: https://marketplace.visualstudio.com/items?itemName=oderwat.indent-rainbow
The Rainbow Brackets extension
If you like the indent-rainbow extension, you might also like Rainbow Brackets extension, which highlights nested parentheses, square brackets, and curly braces in different colours, making it easier to keep track of nested brackets.
Link: https://marketplace.visualstudio.com/items?itemName=2gua.rainbow-brackets#overview
The vscode-icons extension
While this extension is by no means required to run Python code, it change the icons displayed beside files and folders in the sidebar. I find this makes them easier to scan!
Link: https://marketplace.visualstudio.com/items?itemName=vscode-icons-team.vscode-icons
The LiveShare extension
VSCode has a great extension for collaborating with others. It lets you share your whole VSCode workspace so that others can join it and code with you. I often use it for pair programming, although it's great for asking for getting help as well!
Download and install the LiveShare extension here: https://marketplace.visualstudio.com/items?itemName=MS-vsliveshare.vsliveshare
After you've installed it, you'll see a "Live Share" icon and text at the bottom of your VSCode window. Pressing that will start a Live Share session and give you a link that you can share with whomever you want joining your shared session.
Conclusion
That's it! As long as your Python version is in your PATH (which happens automatically on Mac and Linux, and you must tick the box in the installer in Windows), the Python extension will straight work out of the box!
If you have any issues, Google is your best friend as tens of thousands of people use these extensions, so you're likely to be able to find a solution. The development team is also helpful in their GitHub page.
The GitHub page also contains extensive guides and information on how to get the extension up and running, it case it's necessary!
Hope this has been helpful and your environment is now all set up. Happy coding!
Changelog
- March 2023: Removed the "Code Runner" extension as I've found myself not using it at all. Added linting, formatting, and import sorting.
- February 2024: Remove Black and isort, use Ruff instead for linting, formatting, and sorting imports.


