If your application receives file uploads from users, you've got many headaches ahead of you. Storing files in the server makes it difficult to scale, and storing in the database usually makes it very slow (and expensive!). The best alternative is to store files in a web service especially designed for that.
In this article let's talk about Backblaze B2, a file storage solution with a super easy-to-use API and generous free tier. Plus it has full compatibility with the AWS S3 API through boto3.
Today I'll show you how to use b2-sdk-python, their in-house API, and not boto3.
Setting up your B2 account
First, sign up through their web portal.
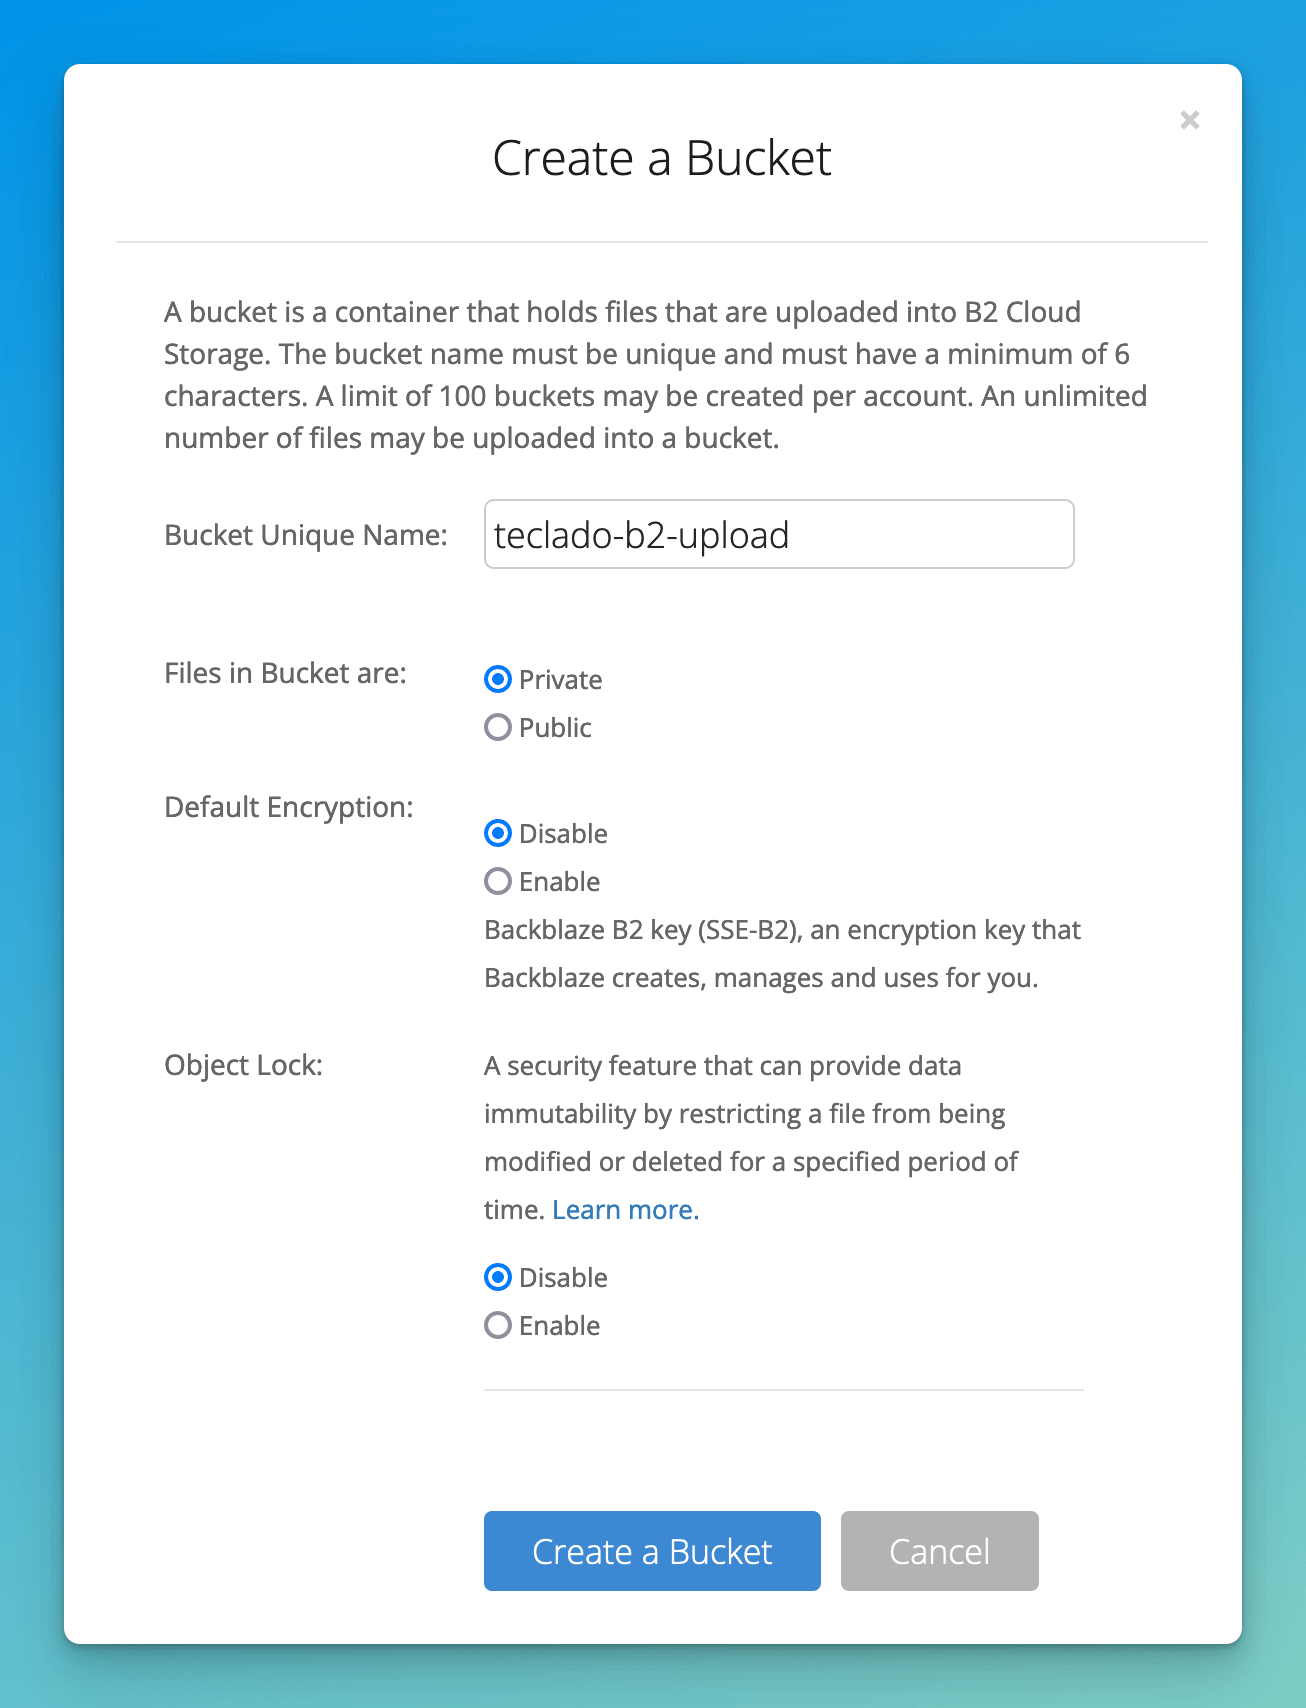
Once done, go into your B2 Cloud Storage Buckets, and create one. Make the files private, disable encryption (for now), and disable the object lock.
Now let's upload a file using Python. After, I'll show you how to integrate uploading to B2 with your Flask apps.
Upload to Backblaze B2 using Python
There are a couple steps to uploading a file to Backblaze B2:
- Authorize your account.
- Access your bucket.
- Figure out what you're uploading.
- Actually upload the file.
Account authorization with Backblaze B2 and Python
You'll need your app keys for this. Get your app keys by going to The "App Keys" section under "Account" on the website:
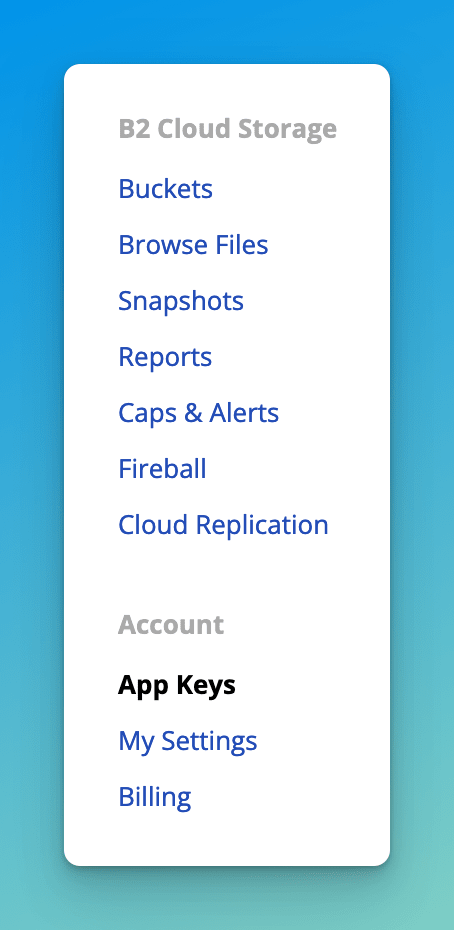
Then, scroll to the bottom and hit "Add a New Application Key".
Here, you'll want to:
- Give the App Key a name.
- Allow access only to the bucket that you want to use in your application (or more, if you want access to multiple buckets).
- Make it "Write only" since this application will allow file uploads, but it won't allow us to read files.
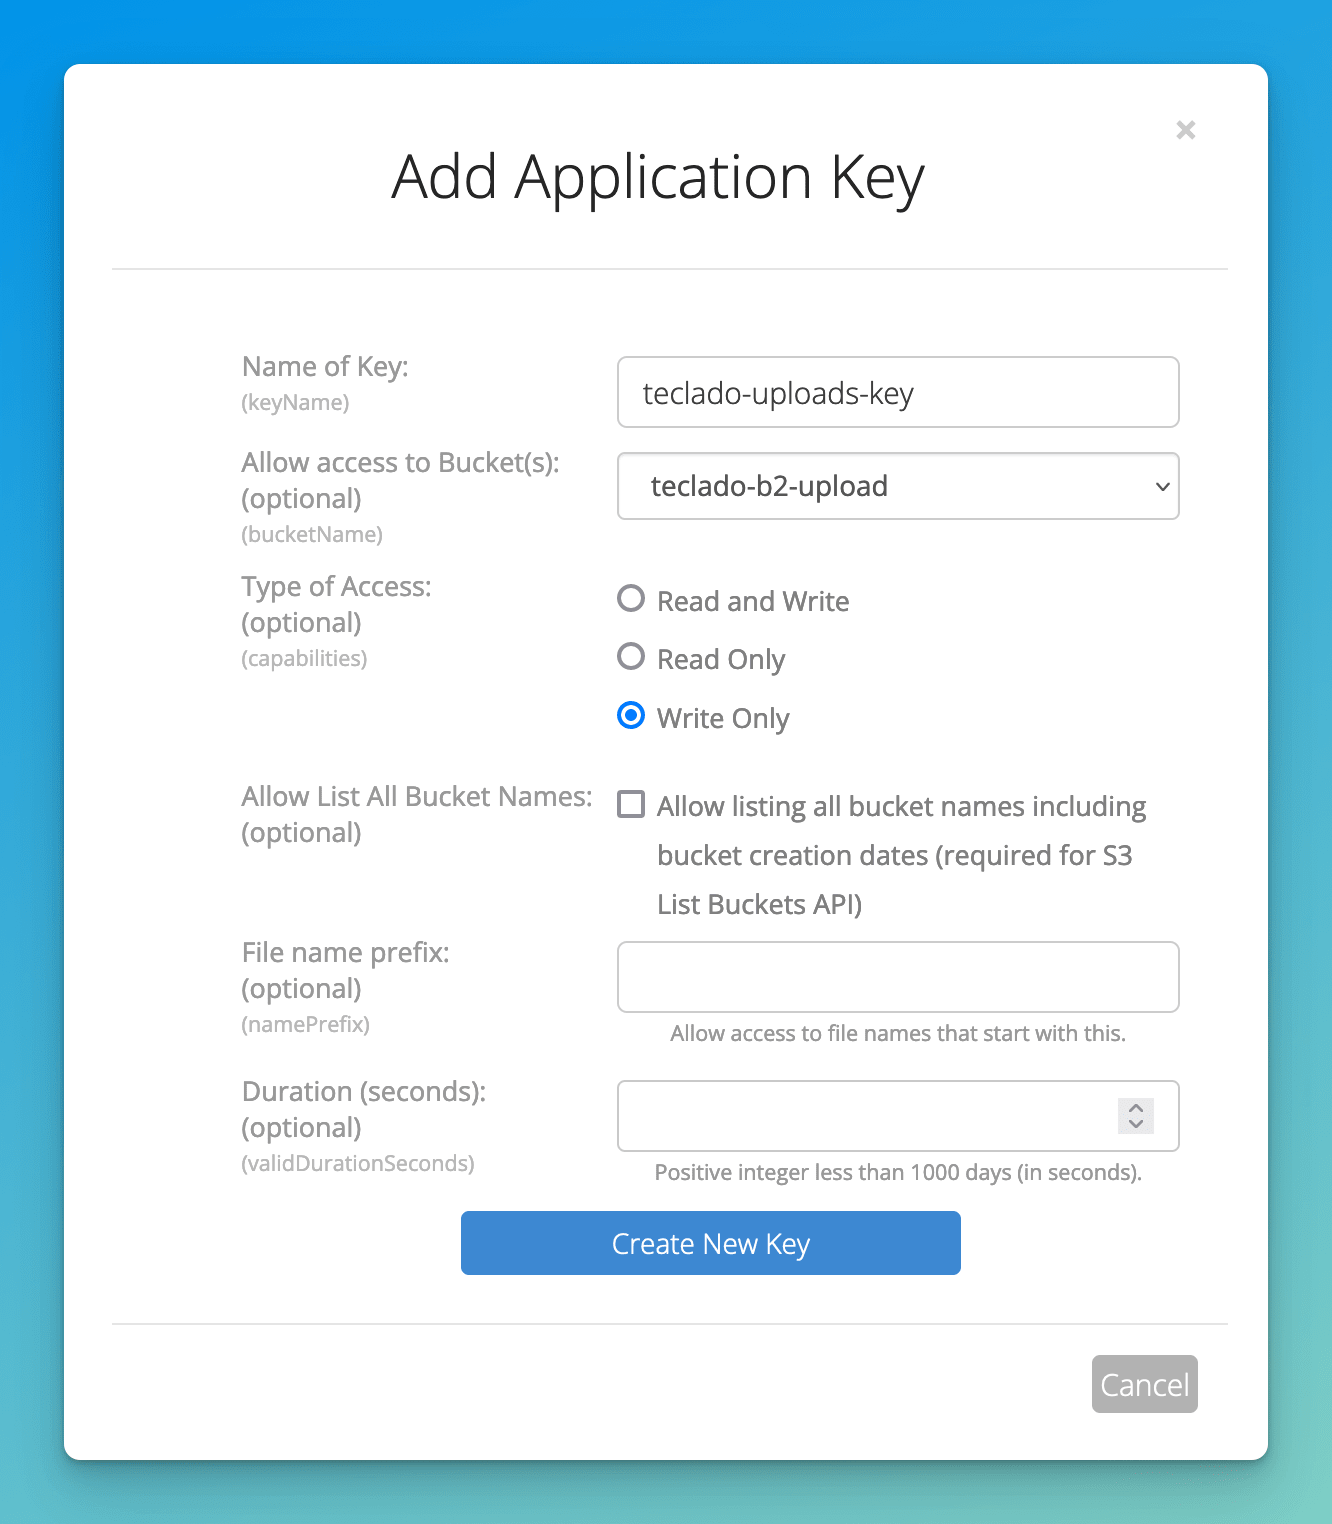
Then, you'll want to save the keyID and applicationKey. For this, create a .env file in your project directory and put the values there (mine are fake values):
B2_KEY_ID=045f47eaec1gfgg94100002
B2_APPLICATION_KEY=J131s4ffbaq6i41SR+Hk131k1kj1jak+ZI
Now that we've got these files here, many sure to add .env to your .gitignore if you are planning on using Git for this:
.env
*.pyc
.DS_Store
.venv
# Other things you want to ignore
Alright, now let's install the Backblaze B2 Python SDK.
First let's create a file called requirements.txt, with the following content in it:
b2sdk
python-dotenv
The python-dotenv library will be used to read the contents of our .env file and put those into environment variables. Then I'll create a virtual environment, activate it, and install the two libraries:
$ pyenv local 3.10.7
$ pyenv exec python -m venv .venv
$ source .venv/bin/activate  # different on Windows
$ pip install -r requirements.txt
Next, create a Python file, such as app.py, for the actual file uploading. At this point it might be good to find a file or image you will test the uploads with, and put that in your project folder too!
import os
import b2sdk.v2 as b2
from dotenv import load_dotenv

load_dotenv()

info = b2.InMemoryAccountInfo()
b2_api = b2.B2Api(info)

application_key_id = os.getenv("B2_KEY_ID")
application_key = os.getenv("B2_APPLICATION_KEY")

b2_api.authorize_account("production", application_key_id, application_key)
The "production" above is the realm. Unfortunately there isn't much information as to what this means.
Access your bucket with the SDK
This one's simple:
bucket = b2_api.get_bucket_by_name("teclado-b2-upload")
Figuring out what to upload and add metadata
Now we must find the file we want to upload, and also determine any metadata that we want to add to the image.
In its simplest terms, that's just doing this:
from pathlib import Path

file_name = "sample.png"
local_file = Path(file_name).resolve()
metadata = {"key": "value"}
Here I'm using pathlib although it isn't strictly necessary, so that later on if you want to start putting things in subdirectories it's a bit easier to do so.
Actually process the upload with the SDK
Finally, to push files to the B2 bucket, do this:
uploaded_file = bucket.upload_local_file(
    local_file=local_file,
    file_name=file_name,
    file_infos=metadata,
)

print(b2_api.get_download_url_for_fileid(uploaded_file.id_))
Doing this uploads your file and gives you a URL where you can see your file... if you had set the files to "public" when creating the bucket. Since we set them to "private", we get a 401 unauthorized error upon accessing that URL.
How to see the uploaded file through the web portal
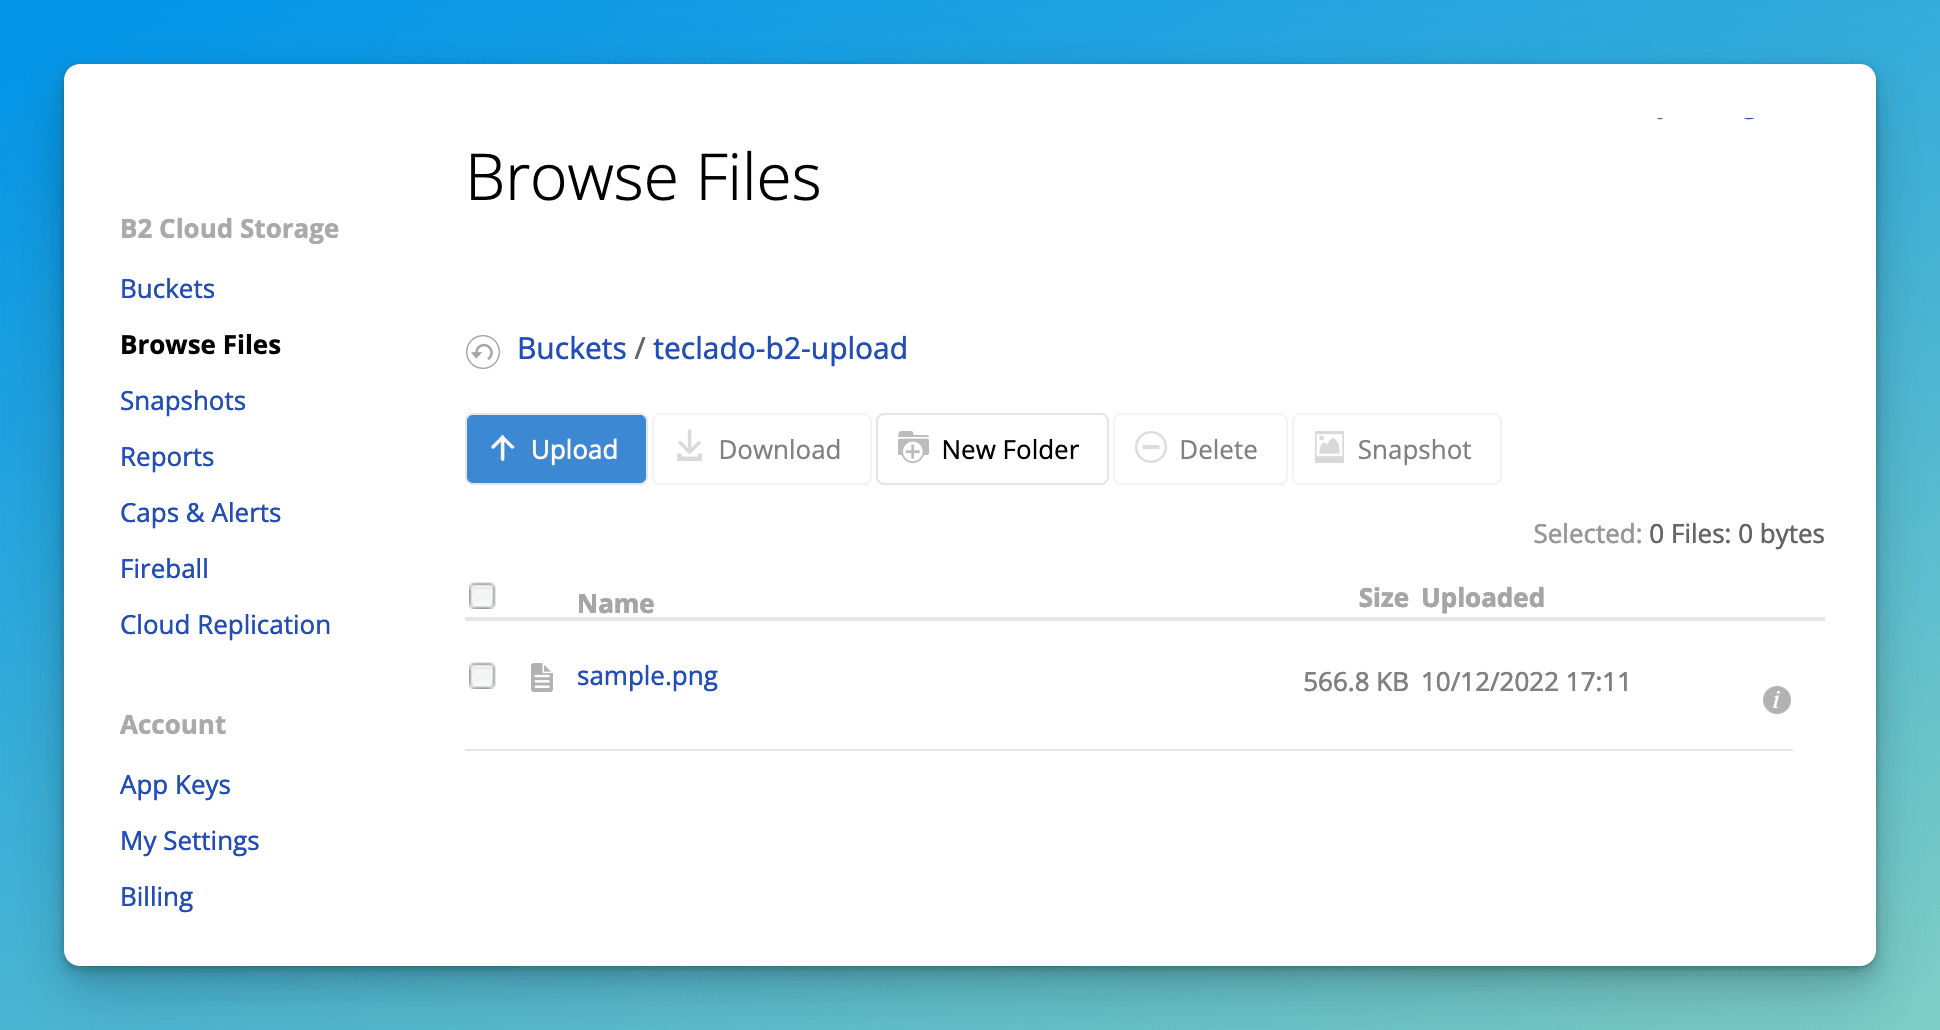
The file is in the bucket though, and you can see it by going into the bucket through the B2 web portal. First access your bucket:
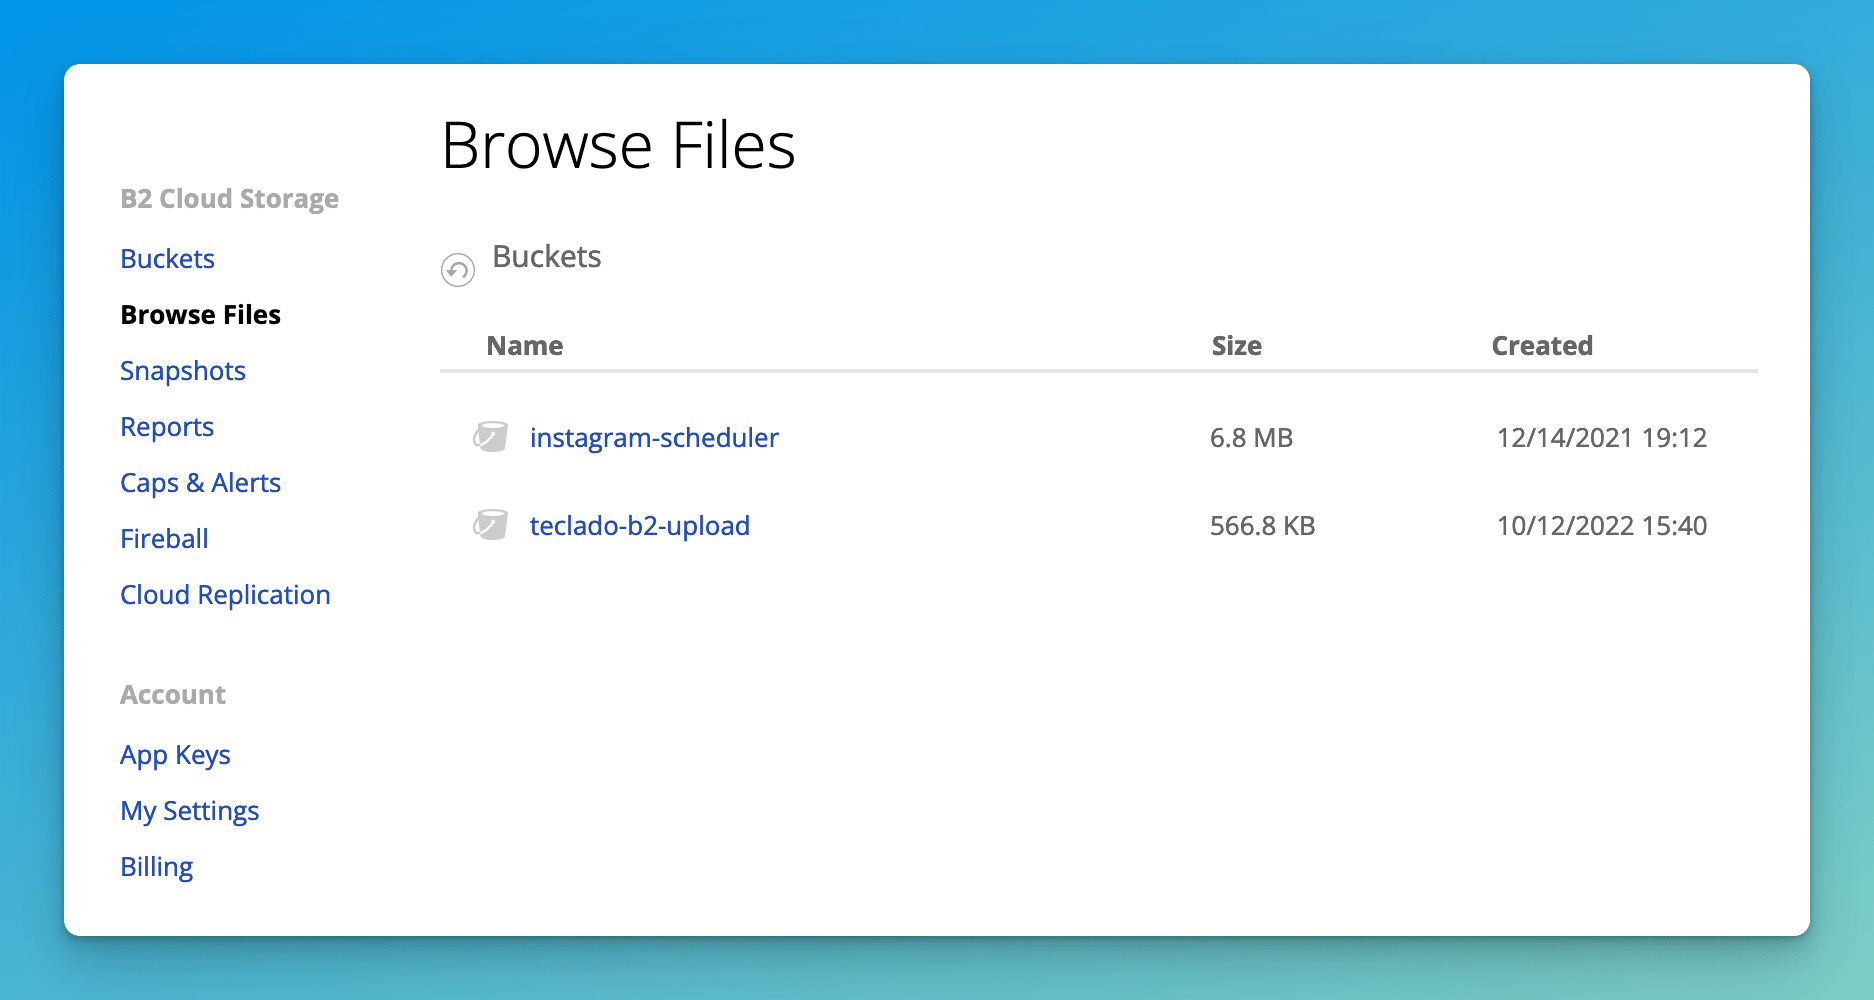
Then you'll see the image there!
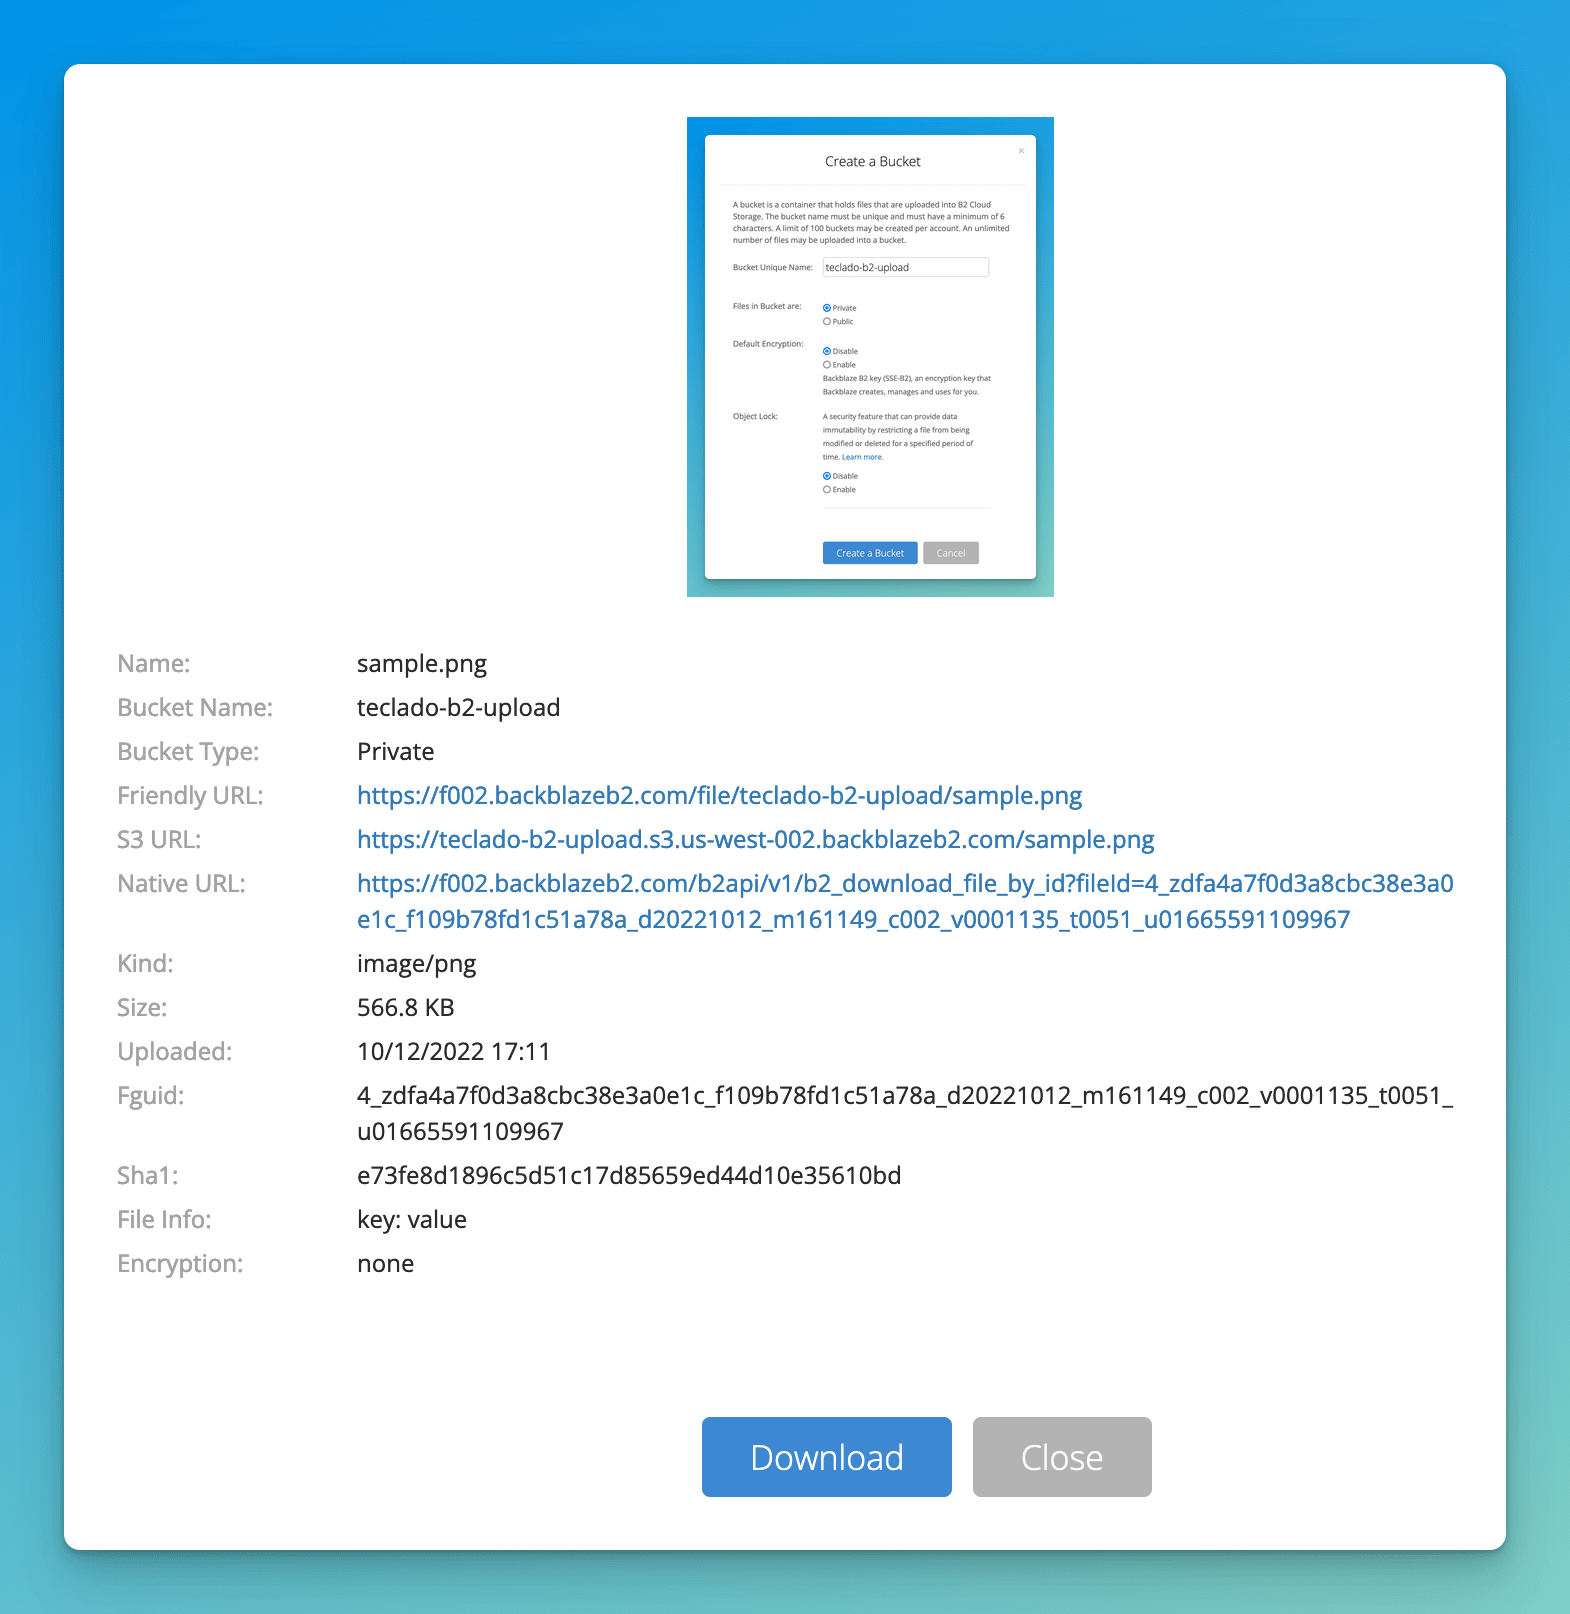
If you click on the image you can see what it looks like, and also you can see the stored information about your image under "File info":
Final code
Here's the code for my app.py which uploads a file to Backblaze B2!
import os
import b2sdk.v2 as b2
from dotenv import load_dotenv
from pathlib import Path

load_dotenv()

info = b2.InMemoryAccountInfo()
b2_api = b2.B2Api(info)

application_key_id = os.getenv("B2_KEY_ID")
application_key = os.getenv("B2_APPLICATION_KEY")

b2_api.authorize_account("production", application_key_id, application_key)

bucket = b2_api.get_bucket_by_name("teclado-b2-upload")

file_name = "sample.png"
local_file = Path(file_name).resolve()
metadata = {"key": "value"}

uploaded_file = bucket.upload_local_file(
    local_file=local_file,
    file_name=file_name,
    file_infos=metadata,
)

print(b2_api.get_download_url_for_fileid(uploaded_file.id_))
Integrate B2 uploads with your Flask app
In a recent Flask blog post we covered image uploads, but we left a key question in the air: what to do with the uploaded files.
Let's integrate the Backblaze B2 upload with that project. In case you've forgotten, that project had a Flask app with two routes: one for serving a page with the file upload form, and one for accepting file "chunks". Each chunk is a portion of the uploaded file. The chunking is done by the library "Dropzone.js", and this makes it so that very large files don't totally block the Flask application.
Our requirements.txt:
flask
Our app.py:
import os
from pathlib import Path

from flask import Flask, render_template, request
from werkzeug.utils import secure_filename

app = Flask(__name__)


@app.get("/")
def index():
    return render_template("index.html")


@app.post("/upload")
def upload_chunk():
    file = request.files["file"]
    file_uuid = request.form["dzuuid"]
    # Generate a unique filename to avoid overwriting using 8 chars of uuid before filename.
    filename = f"{file_uuid[:8]}_{secure_filename(file.filename)}"
    save_path = Path("static", "img", filename)
    current_chunk = int(request.form["dzchunkindex"])

    try:
        with open(save_path, "ab") as f:
            f.seek(int(request.form["dzchunkbyteoffset"]))
            f.write(file.stream.read())
    except OSError:
        return (
            "Error saving file.",
            500,
        )  # 400 and 500 error codes show up in Dropzone as errors

    total_chunks = int(request.form["dztotalchunkcount"])

    if current_chunk + 1 == total_chunks:
        # This was the last chunk, the file should be complete and the size we expect
        if os.path.getsize(save_path) != int(request.form["dztotalfilesize"]):
            return "Size mismatch.", 500

    return "Chunk upload successful.", 200
Our index.html:
<!DOCTYPE html>
<html lang="en">
<head>
    <meta charset="UTF-8">
    <meta http-equiv="X-UA-Compatible" content="IE=edge">
    <meta name="viewport" content="width=device-width, initial-scale=1.0">
    <script src="https://unpkg.com/dropzone@5/dist/min/dropzone.min.js"></script>
    <link rel="stylesheet" href="https://unpkg.com/dropzone@5/dist/min/dropzone.min.css" type="text/css" />
    <title>File Upload with Dropzone.js</title>
</head>
<body>
    <form
        method="POST"
        action="/upload"
        class="dropzone dz-clickable"
        id="dropper"
        enctype="multipart/form-data"
    >
    </form>

    <script type="application/javascript">
        Dropzone.options.dropper = {
            paramName: "file",
            chunking: true,
            forceChunking: true,
            url: "/upload",
            maxFilesize: 1025, // megabytes
            chunkSize: 10000 // bytes
        }
    </script>
</body>
</html>
To integrate B2 into this application, all we have to do is connect to our application and get our bucket, and then when we finish receiving all the file chunks, upload the finished file to B2.
We do need to store the file somewhere for a few seconds, since our upload method requires the file be in disk before uploading it to B2.
Our app is already doing that, so there isn't much to add. As a recap:
- Create your
.envfile with yourB2_KEY_IDandB2_APPLICATION_KEY. - Authorise your account.
- Get your bucket.
- Upload your file.
Authorise your B2 account and get the bucket when creating the app
At the top of the file, after creating the app, I'll add the code we've already seen to authorise the account. I've left a comment on the lines that were already there.
import os  # existing code
import b2sdk.v2 as b2
from pathlib import Path  # existing code

from flask import Flask, render_template, request  # existing code
from werkzeug.utils import secure_filename  # existing code
from dotenv import load_dotenv

load_dotenv()

app = Flask(__name__)  # existing code

info = b2.InMemoryAccountInfo()
b2_api = b2.B2Api(info)

application_key_id = os.getenv("B2_KEY_ID")
application_key = os.getenv("B2_APPLICATION_KEY")

b2_api.authorize_account("production", application_key_id, application_key)

bucket = b2_api.get_bucket_by_name("teclado-b2-upload")
Upload the file when you receive the last chunk
At the moment our upload endpoint has this set of if statements in it:
if current_chunk + 1 == total_chunks:
    # This was the last chunk, the file should be complete and the size we expect
    if os.path.getsize(save_path) != int(request.form["dztotalfilesize"]):
        return "Size mismatch.", 500
We're checking that we've finished uploading the file, and we're checking if there was an error.
We can add an else branch to the inner if statement which will run when the upload is successful. In there, we'll do our upload! Remember the file should be at ./static/img/{filename} already. Also remember to delete the file from the local disk so they don't stick around forever:
if current_chunk + 1 == total_chunks:
    # This was the last chunk, the file should be complete and the size we expect
    if os.path.getsize(save_path) != int(request.form["dztotalfilesize"]):
        return "Size mismatch.", 500
    else:
        # Upload successful, so let's put the file in B2
        uploaded_file = bucket.upload_local_file(
            local_file=save_path.resolve(),
            file_name=filename
        )
        os.remove(save_path)  # Delete file so they don't stick around forever

        print(b2_api.get_download_url_for_fileid(uploaded_file.id_))
And that's it! That should upload your file (with a unique name) to Backblaze B2.
In this post we've learned how to upload files to Backblaze B2 using Python, as well as how to integrate the file upload into a Flask app using Dropzone.js. I hope you've enjoyed it!
If you want to learn much more about web development using Flask and Python, including HTML, CSS, designing web applications, interactivity, and much more, consider enrolling in our Web Developer Bootcamp with Flask and Python!


